Creating Glossy Logo Animation Without Using Any Third Party Plugin – After Effects Tutorial + Template


Ae Template Link
Please scroll down to the download section and click on ‘get Template’ button.
Creating Glossy Logo Animation – Follow these steps
Step 1:
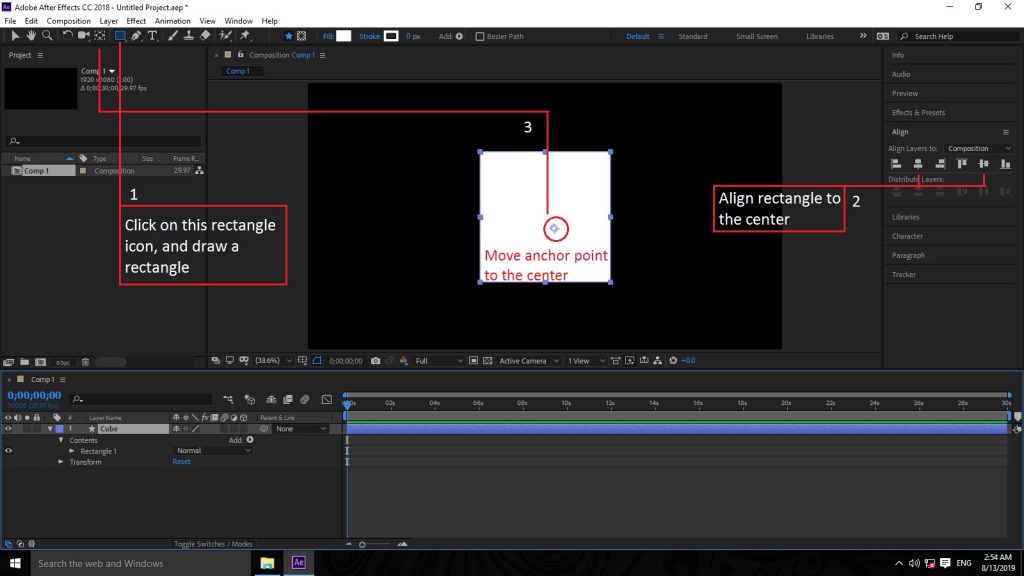
Open Adobe After Effects, create a new composition. Click on rectangular icon or press the [Q] key on keyboard and draw a new rectangle without outline. See figure MTC01
Related topics: 100+ free Ae Templates
Then goto the alignment panel and align the layer to horizontally and vertically.
Step 2:
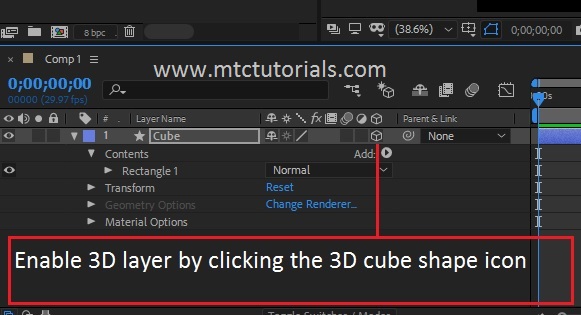
In switchis panel click on 3D Cubic icon. It will convert the layer to 3 Dimensions (3D). Now you allow the layer to be manipulated in 3 dimensions. See figure MTC02
Download Links
Step 3:
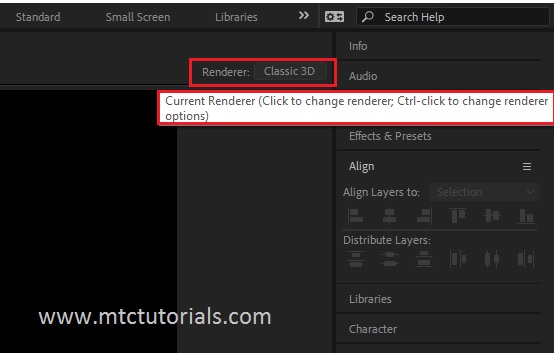
Change the render settings from classic 3D to Ray-Traced 3D. See figure MTC03
There are three different types of render layers inside Adobe After Effects.
- Classic 3D
- Cinema 4D
- And Ray-Traced
1. Classic 3D Render
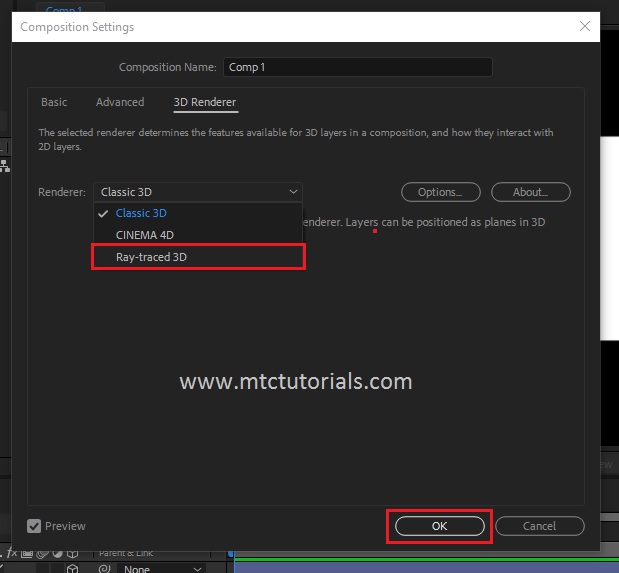
Classic 3D is the traditional After Effects render. In this type layers can be positioned as planes in 3D space.
2. Cinema 4D Render
The cinema 4D renderer extrusion of text and shapes. It is the preferred render for extruded 3D work on most computers.
3. Ray-Traced Render
The Ray-Traced 3D render enabels extension of text and shapes. This option is only recommended for configurations with appropriate NVIDIA CUDA Graphics card.
Related topics: Watch Intro Making Tutorials
In this project we are going with the Ray-Traced 3D render. Select the Ray-Traced 3D in the drop down menu and click [OK]. See figure MTC04
Step 4: Camera in After Effects
Right click on the composition empty area, move up to the New and select Camera.
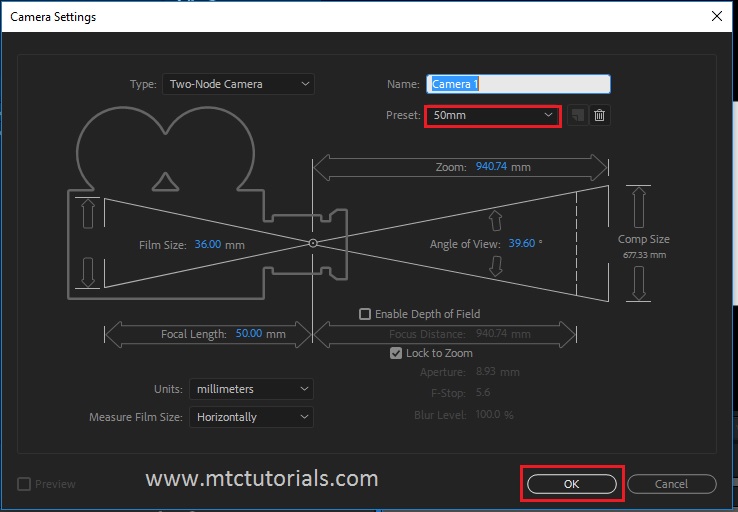
Camera Settings
- The camera type must be Two-Node Camera.
- Select 50mm next to the Preset.
- Click OK
See figure MTC05
Step 5:
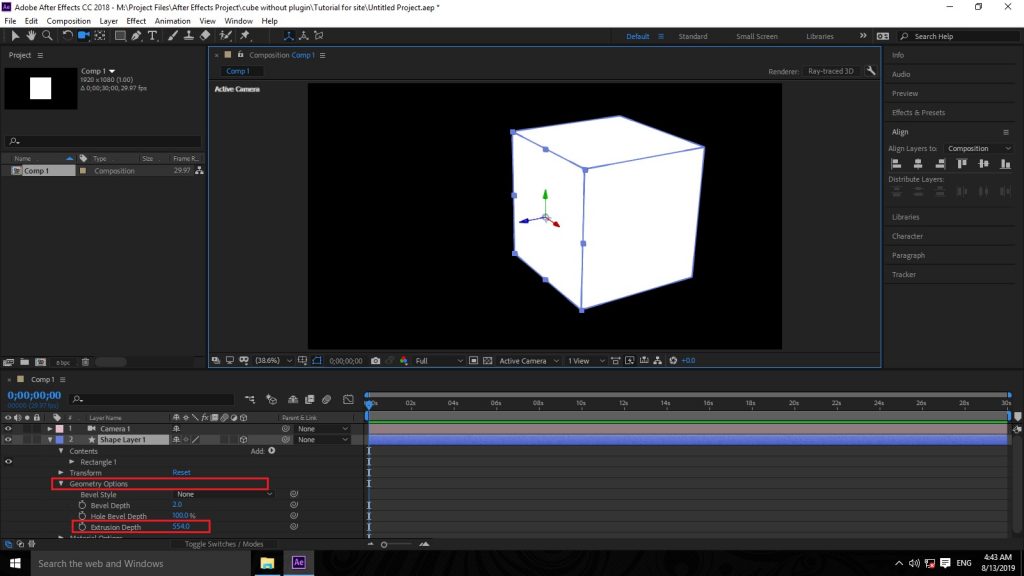
Under the shape layer click the geometry options, then enter 554.0 in the extrusion depth value and press enter. See figure MTC06
Free Offer: Learn Adobe After Effects Advanced
